Messaging with ActiveMQ Artemis and ASP.NET Core
The niche of message brokers in the .NET world is vastly dominated by a single species - RabbitMQ. If you’re a .NET developer and you’re building microservices your technology stack most probably boils down to RabbitMQ and some fancy framework like NServiceBus or MassTransit on top of it. At least regarding the messaging. In this article, however, I would like to discuss a different solution. The solution that never got too much love from the .NET community - Apache ActiveMQ Artemis.
I think it’s about time to question the status quo because Apache ActiveMQ Artemis is a feature-rich, mature, and exceptionally fast1 message broker. In this blog post, I will show you how to use it in ASP.NET Core application.
Starting the broker
Before we can start, you need to have ActiveMQ Artemis installed on your machine. You can get the latest release from here. Once the ActiveMQ distribution has been downloaded and extracted you can follow the official installation guidelines to start ActiveMQ Artemis server. Be mindful that ActiveMQ Artemis is written in Java, so you will need Java Runtime Environment (JRE) to be able to run it.
Another, much easier, and faster way of spinning up ActiveMQ Artemis instance is to go for unofficial docker image created and maintained by Victor Romero.
You can use the following docker-compose.yml to quickly pull and run the image.
version: "3"
services:
  activemq-artemis:
    container_name: activemq-artemis
    image: vromero/activemq-artemis
    environment:
      - ARTEMIS_USERNAME=guest
      - ARTEMIS_PASSWORD=guest
    ports:
      - 5672:5672
      - 8161:8161
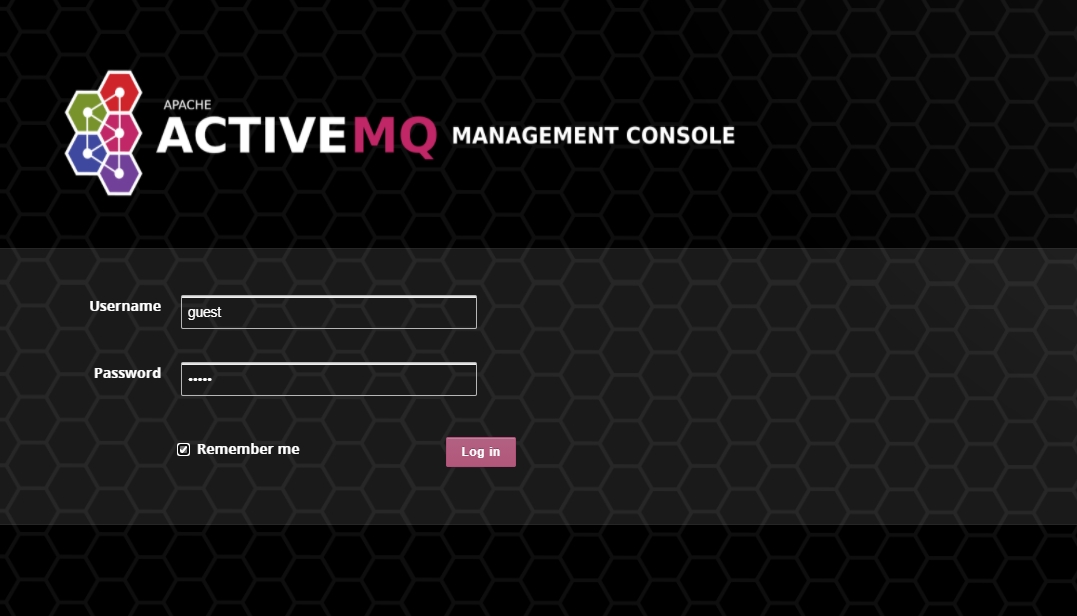
It will start the broker, create a default user with a username and password guest / guest, and expose the web console on port 8161 alongside with AMQP endpoint on port 5672. At this point, you should be able to go to:
http://localhost:8161/console/loginand see the management console screen.

Demo application
ActiveMQ Artemis has plenty of features that could help you to address even the most bizarre integration scenarios. As this blog post is meant to be a simple demonstration, I am not going to pull in anything too complex.
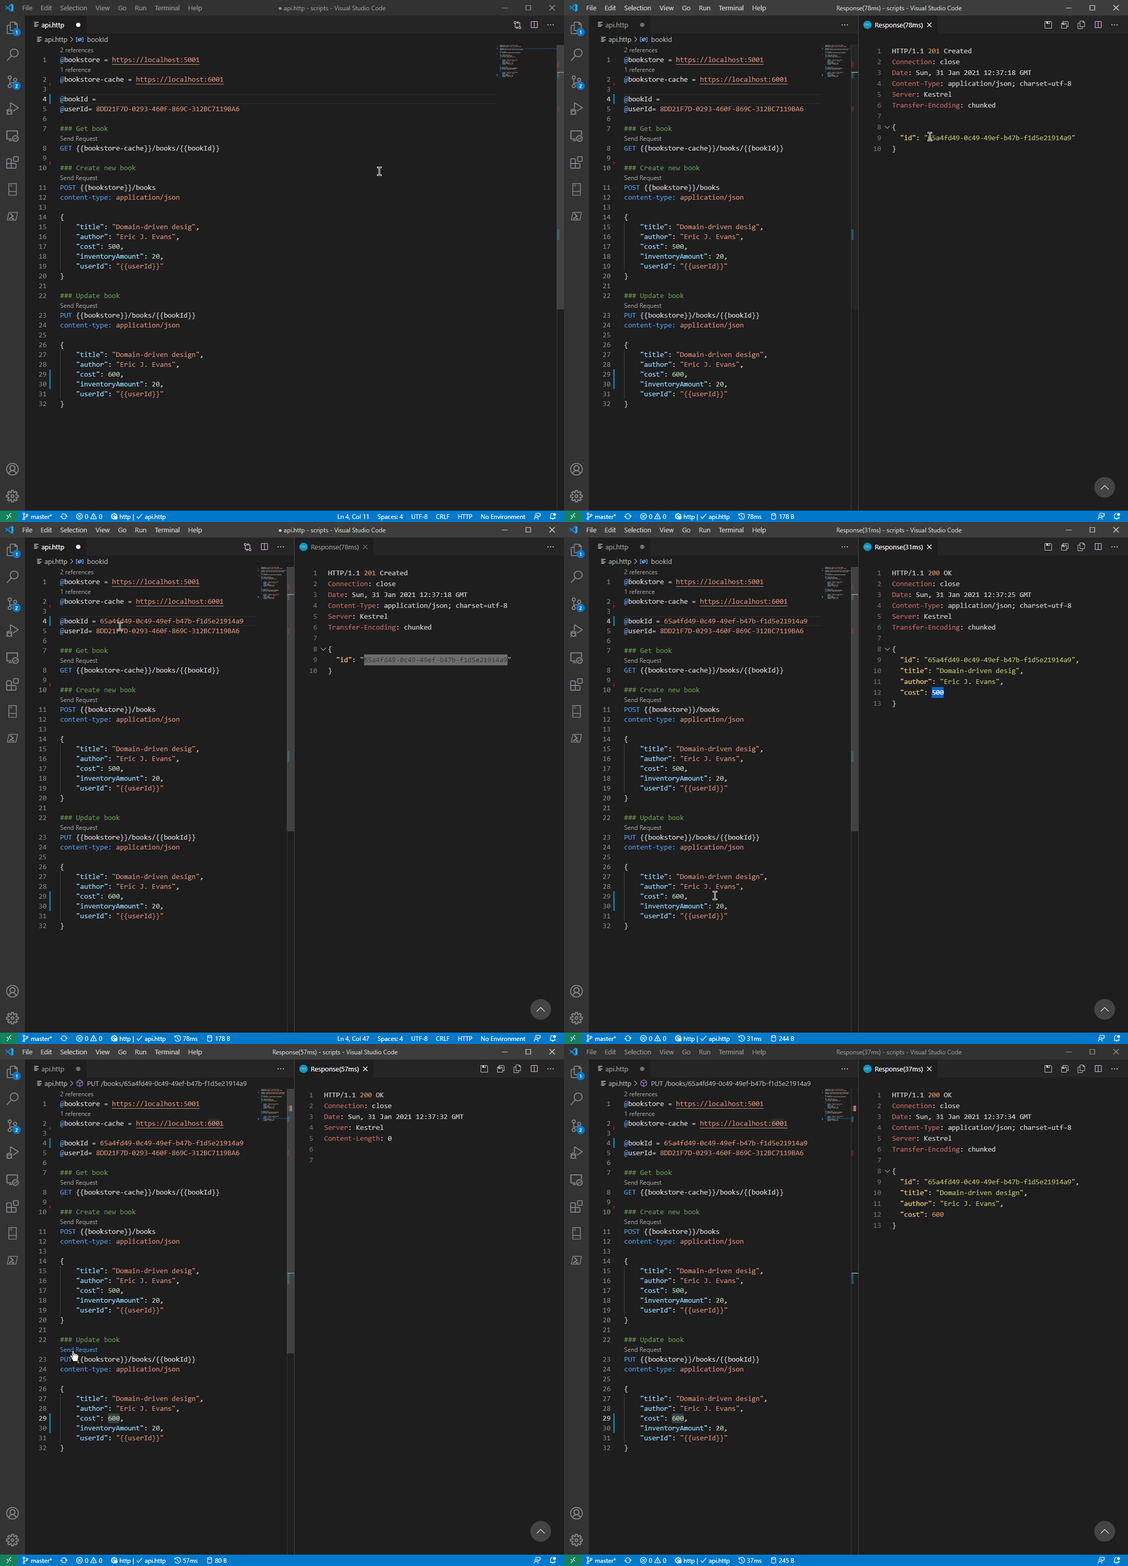
I’ve created an example application, that should be enough to show you how to send and consume messages. As always you can find the finished demo on GitHub.
The example application consists of two microservices:
- Bookstore is a management service that exposes functionalities like adding and updating positions in a book catalog.
- Bookstore Cache is a caching layer. Its sole role is to provide quick read access to the catalog.
In real life, you should almost never write your own distributed cache. Just use some off-the-shelf solution and focus on solving real business problems. You will thank me later. 😉
As you can see the integration scenario is rather self-explanatory. Each change made in Bookstore service should be reflected in Bookstore Cache. In order to do so, we need to send a notification message whenever something changes in Bookstore service. Each Bookstore Cache instance should actively listen to these messages and update its internal state accordingly.

.NET Client for ActiveMQ Artemis
Sending and receiving messages wouldn’t be possible without a client library. In this article, I am going to use .NET Client for ActiveMQ Artemis.

You can add ArtemisNetClient NuGet package to your project using dotnet CLI:
dotnet add package ArtemisNetClientArtemisNetClient is a lightweight library built on top of AmqpNetLite. It tries to fully leverage Apache ActiveMQ Artemis capabilities. It supports ActiveMQ Artemis address model (with management API), has a built-in configurable auto-recovery mechanism, transactions, asynchronous API, and a handful of other useful features.
ArtemisNetClient integrates with .NET Core applications seamlessly, thanks to two additional packages:
- ArtemisNetClient.Extensions.DependencyInjection
- ArtemisNetClient.Extensions.Hosting
Adding them to your project is as simple as:
dotnet add package ArtemisNetClient.Extensions.DependencyInjection
dotnet add package ArtemisNetClient.Extensions.Hosting
The first package provides integration with .NET dependency injection system. The second helps you to manage the client’s lifecycle. It will open the connection to the broker when your application starts, and close it before your application shuts down.
Having the packages installed you can enable ActiveMQ support in your project as follows:
public void ConfigureServices(IServiceCollection services)
{
    /*...*/
    var endpoints = new[] { Endpoint.Create(host: "localhost", port: 5672, "guest", "guest") };
    services.AddActiveMq("bookstore-cluster", endpoints);
    services.AddActiveMqHostedService();
}
AddActiveMq extension method returns an instance of IActiveMqBuilder. With its fluent API, you can configure producers and consumers you want to have in your application.
Sending a message
For Bookstore service, we would like to be able to send a notification whenever a book was created or updated. To properly express these events I defined two classes: BookCreated and BookUpdated. They have exactly the same properties (which is unfortunate, but a normal thing in case of CRUD APIs), the only bit that differs is the intent of the change. The first message should be sent when the book was created and the second when the book was updated.
To send a message we will need a message producer. ActiveMQ Artemis allows you to use two types of message producers. Depending on your use case you may want to choose a message producer created with or without a pre-defined destination (address & routing type). Likewise, the client library uses two interfaces to represent these concepts: IProducer and IAnonymousProducer.
In our example, I choose a simple rooting strategy. Each type of message will have its own address. We could either create two instances of IProducer or a single IAnonymousProducer instance responsible for handling both types of messages. As I prefer a more generic approach I’d opt for the second option.
With IActiveMqBuilder in place we can configure a message producer with an additional single line of code:
public void ConfigureServices(IServiceCollection services)
{
    /*...*/
    var endpoints = new[] { Endpoint.Create(host: "localhost", port: 5672, "guest", "guest") };
    services.AddActiveMq("bookstore-cluster", endpoints)
            .AddAnonymousProducer<MessageProducer>();
    /*...*/
}
MessageProducer is our custom class that expects the IAnonymousProducer to be injected via the constructor2. Once we have our custom class, we can either expose the IAnonymousProducer directly or encapsulate sending logic inside of it:
public class MessageProducer
{
    private readonly IAnonymousProducer _producer;
    public MessageProducer(IAnonymousProducer producer)
    {
        _producer = producer;
    }

    public async Task PublishAsync<T>(T message)
    {
        var serialized = JsonSerializer.Serialize(message);
        var address = typeof(T).Name;
        var msg = new Message(serialized);
        await _producer.SendAsync(address, msg);
    }
}
Our custom message producer fully encapsulates sending logic. First, it serializes the message into a transmittable payload using JsonSerializer, then it infers the address from the type of the passed message, and finally, it sends the message using the injected instance of IAnonymousProducer.
A naive implementation of BooksController that implements the core functionality of Bookstore service might look like that:
[ApiController]
[Route("[controller]")]
public class BooksController : ControllerBase
{
    private readonly BookstoreContext _context;
    private readonly MessageProducer _messageProducer;

    public BooksController(BookstoreContext context, MessageProducer messageProducer)
    {
        _context = context;
        _messageProducer = messageProducer;
    }

    [HttpPost]
    public async Task<IActionResult> Post([FromBody] CreateBook command)
    {
        var newBook = new Book
        {
            Id = Guid.NewGuid(),
            Title = command.Title,
            Author = command.Author,
            Cost = command.Cost,
            InventoryAmount = command.InventoryAmount,
        };
        await _context.Books.AddAsync(newBook);
        await _context.SaveChangesAsync();

        var @event = new BookCreated
        {
            Id = newBook.Id,
            Title = newBook.Title,
            Author = newBook.Author,
            Cost = newBook.Cost,
            InventoryAmount = newBook.InventoryAmount,
            UserId = command.UserId,
            Timestamp = DateTime.UtcNow
        };

        await _messageProducer.PublishAsync(@event);

        return StatusCode((int) HttpStatusCode.Created, new { newBook.Id });
    }

    [HttpPut("{id}")]
    public async Task<IActionResult> Put(Guid id, [FromBody] UpdateBook command)
    {
        var book = await _context.Books.FindAsync(id);
        if (book == null)
        {
            return NotFound();
        }

        book.Title = command.Title;
        book.Author = command.Author;
        book.Cost = command.Cost;
        book.InventoryAmount = command.InventoryAmount;

        _context.Books.Update(book);
        await _context.SaveChangesAsync();

        var @event = new BookUpdated
        {
            Id = book.Id,
            Author = book.Author,
            Cost = book.Cost,
            Title = book.Title,
            InventoryAmount = book.InventoryAmount,
            UserId = command.UserId,
            Timestamp = DateTime.UtcNow
        };
        await _messageProducer.PublishAsync(@event);

        return Ok();
    }
}
This example by no means represents a production-ready solution. If you have seen something along these lines in your codebase, I would strongly advise you to go and watch a great presentation by Szymon Pobiega that thoroughly discusses all possible pitfalls with this kind of implementation.
Consuming a message
Consuming a message is just a little bit more complicated than sending one. Dependency injection extensions for ArtemisNetClient gives you all the building blocks you need to build your own consuming pipeline. By default you can register a consumer by using AddConsumer extension method on IActiveMqBuilder:
public void ConfigureServices(IServiceCollection services)
{
    /*...*/
    var endpoints = new[] { Endpoint.Create(host: "localhost", port: 5672, "guest", "guest") };
    services.AddActiveMq("bookstore-cluster", endpoints)
            .AddConsumer("BookUpdated", RoutingType.Multicast,
                async (message, consumer, serviceProvider, cancellationToken) =>
                {
                    // your consuming logic
                    await consumer.AcceptAsync(message);
                });
    /*...*/
}
The last parameter of this method for each overload is a message handling callback. It will be invoked every time a new message arrives. As you can see, there are quite a few parameters to this callback. The first two represent ArtemisNetClient’s Message and IConsumer objects respectively. You need a consumer instance, as without it, you wouldn’t be able to acknowledge the fact that message was processed. If you forgot about doing that, you could very easily run out of the consumer’s credit and effectively block your consumer (you can read more about consumer credit in the client documentation).
The third parameter is nothing else but IServiceProvider instance. This interface represents a great extensibility point. Having it, and with a little help of generics, we can with a few lines of code write our own strongly typed message processing pipeline.
public interface ITypedConsumer<in T>
{
    public Task ConsumeAsync(T message, CancellationToken cancellationToken);
}
ITypedConsumer is a focal point of our simple consuming pipeline. This marker interface allows us to associate a message of a specific type with the appropriate message handler.
The next step is to define an extension method that will register and bind our ITypedConsumer with a message processing callback.
public static class ActiveMqExtensions
{
    public static IActiveMqBuilder AddTypedConsumer<TMessage, TConsumer>(this IActiveMqBuilder builder,
        RoutingType routingType)
        where TConsumer : class, ITypedConsumer<TMessage>
    {
        builder.Services.TryAddScoped<TConsumer>();
        builder.AddConsumer(typeof(TMessage).Name, routingType, HandleMessage<TMessage, TConsumer>);
        return builder;
    }

    private static async Task HandleMessage<TMessage, TConsumer>(Message message,
        IConsumer consumer,
        IServiceProvider serviceProvider,
        CancellationToken token)
        where TConsumer : class, ITypedConsumer<TMessage>
    {
        var msg = JsonSerializer.Deserialize<TMessage>(message.GetBody<string>());
        using var scope = serviceProvider.CreateScope();
        var typedConsumer = scope.ServiceProvider.GetService<TConsumer>();
        await typedConsumer.ConsumeAsync(msg, token);
        await consumer.AcceptAsync(message);
    }
}
The code above does exactly that. First, it tries to register IConsumer instance in the dependency injection container (so later it can be resolved inside of HandleMessage callback). Then it registers the actual ActiveMQ consumer using message type name as the address.
HandleMessage method is the pipeline itself. In our example it contains of the following steps:
- It deserializes the message
- It creates a new
IServiceScopethat is then used to resolveIConsumerinstance - It dispatches the message to be processed by the consumer
- It acknowledges the message after it was successfully consumed
This is not much but it is enough to put our simple example together. In a real-world application you should definitely extend the pipeline with additional error handling logic, maybe add some transaction management if you are going to perform any database operations, or put there any other cross-cutting corners handling code you can think of3.
With all the bits in place, we can finally implement the two most important classes in Bookstore.Cache: BookCreatedConsumer and BookUpdatedConsumer. For brevity, I will omit the second one, as it doesn’t add anything new to the picture.
public class BookCreatedConsumer : ITypedConsumer<BookCreated>
{
    private readonly BookCache _bookCache;

    public BookCreatedConsumer(BookCache bookCache)
    {
        _bookCache = bookCache;
    }

    public async Task ConsumeAsync(BookCreated message, CancellationToken cancellationToken)
    {
        await _bookCache.AddOrUpdate(new BookCacheEntry(
            id: message.Id,
            title: message.Title,
            author: message.Author,
            cost: message.Cost), cancellationToken);
    }
}
Registering our handlers is as simple as:
/*...*/
var endpoints = new[] { Endpoint.Create(host: "localhost", port: 5672, "guest", "guest") };
services.AddActiveMq("bookstore-cluster", endpoints)
        .AddTypedConsumer<BookCreated, BookCreatedConsumer>(RoutingType.Multicast)
        .AddTypedConsumer<BookUpdated, BookUpdatedConsumer>(RoutingType.Multicast);
/*...*/
Summary
In this blog post, you learned how simple it may be to use Apache ActiveMQ Artemis in ASP.NET Core application. If you have any questions or some points are not clear to you, please leave me a comment below!
Footnotes:
-
According to the benchmarks Apache ActiveMQ Artemis it’s over two times faster than RabbitMQ - 52 820 msgs/s vs 19 000 msgs/s. ↩
-
It uses a mechanism similar to the one applied by Typed Http Clients in IHttpClientFactory. ↩
-
Opening log or tracing scopes, collecting metrics, just to name a few. ↩
Subscribe to Havret on Software
Get the latest posts delivered right to your inbox